|
Building a Wooden Sailboat: The Design,
Build, and Launch of the Whimsey
Planking
and Bowsprit
It
was only about September or October that I began to think
of making a raft. By that time my arm had healed, and both
my hands were at my service again. At first, I found my helplessness
appalling. I had never done any carpentry or such-like work
in my life, and I spent day after day in experimental chopping
and binding among the trees. I had no ropes, and could hit
on nothing wherewith to make ropes; none of the abundant creepers
seemed limber or strong enough, and with all my litter of
scientific education I could not devise any way of making
them so. I spent more than a fortnight grubbing among the
black ruins of the enclosure and on the beach where the boats
had been burnt, looking for nails and other stray pieces of
metal that might prove of service. H. G. Wells - The
Island of Doctor Moreau
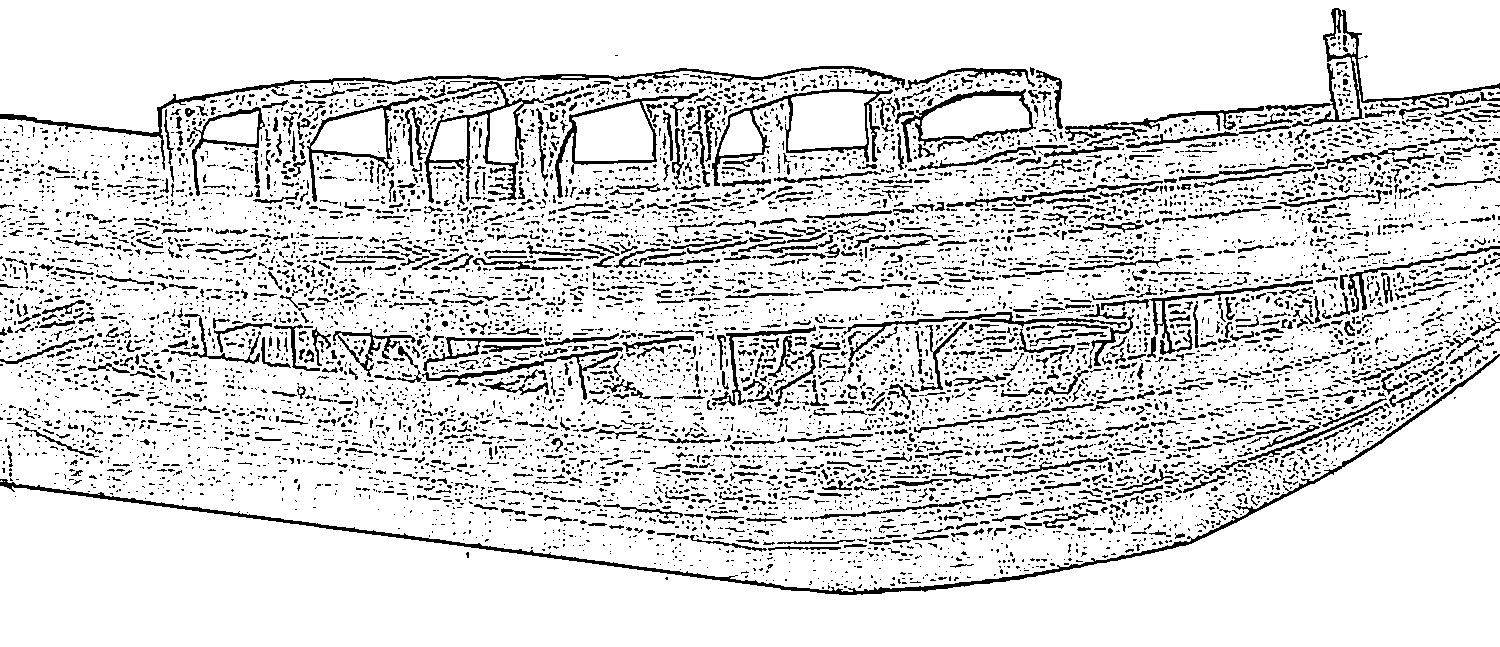
When I began
planking I started at the line of the upper deck. First I had
to wait until the planks were finished by the mill. I'd requested
them to be planed to a thickness of three quarters of an inch
(1.9 cm), only to find that when I went to pick them up they were
only planed on one side. How the instructions got lost I had no
idea, and I couldn't imagine how the guy who planed them thought
I'd be moulding rough-cut planks to the ribs, but I needed them
re-planed. I told them about the mistake, and they said they'd
redo them, which meant that I lost another eighth of an inch (.31
cm). Once I'd guessed at the flexibility of the wood by what I'd
been using, I figured that the mistake was in my favour. The thinner
planks were easier to steam and bend.
I rabbeted
the stem by running the circular saw over it along the line I'd
drawn, and then finished the fine work with a chisel. I was impatient
to get to the planking, so I could easily have done a better job
on the rabbet. It was perhaps 3/8 of an inch (.95 cm) deep and
more or less on the desired angle, but in retrospect it would
have been better to have spent more time cutting the rabbet so
that it would more easily match the planks.
Rather than
lose timber by scarfing the joins, I butt-blocked two planks together
with glue and deck screws. That gave me over twenty feet (6.09
metres) of planking that would easily reach from stem to stern.
I steamed the first plank by boiling water in an electric kettle
and then pouring that over t-shirts I wrapped around the plank.
When the plank was thoroughly steamed-at least as much as I needed
and could do without a steam box-I clamped it to the central ribs,
and then worked from amidships aft and forward. When I was fitting
the plank to the stem I needed multiple tries to get it into place,
each time clamping it nearly into place and then trimming it with
the electric planer. When I finally had it clamped to the outside
of the transom and connected on an angle to where it would meet
the stem properly, I used the industrial polyurethane glue and
clamped and then deck-screwed it into place. It was a procedure
which took a few hours, and when I finally had it seated, I scraped
away the glue and began to work on the next plank.
I'm sure that
someone working from professional plans would have done a much
better job. They would have known the exact angles and dimensions
which would mate the planks to the ribs, but I had no such advantages.
In all my research for boat plans, I saw none that matched what
I wanted. I had no choice but draw up my own plans, and for every
hour I gained by avoiding the calculations which would lead to
more detailed plans, I spent my time trimming and measuring and
cutting and sanding.
Once the top
plank was in place, I decided to work on the garboard, the one
nestled in beside the keel. Although I wouldn't advise it now
that I know better, I decided to cut a two-inch (5 cm) plank and
then install it by gluing it to the keel, screwing it in place
through the body of the thin plank and by screwing and gluing
to the ribs. This meant the ribs were more securely held in place,
and the garboard operated as part of the structure holding the
ribs to the keel. Normally a wooden boat would have the plank
along the keel cut on a long curve to a point, and it would be
connected to the next plank in a way that the middle of each would
make up the difference between the middle planks and the bottom
ones.

Unfortunately,
the way I did it-running a narrow plank along the keel and up
towards both the transom and the stem-also left me with awkward
ends of the plank. The forward end needed to be cut on a long
angle to fit the next plank as it walked up the stem, and the
ribs needed to be cut on an angle to hold the angled plank. That
meant using the planer to insert a slope that would have been
better to have cut into the ribs originally. I trimmed it into
place, although I wasn't happy with its fit, and then went back
to the upper plank to fit the next one down.
I spent many
days on the planking, even though Joshua Slocum had glossed over
the matter in one line: "The planks for the new vessel, which
I soon came to put on, were of Georgia pine an inch and a half
thick. The operation of putting them on was tedious, but, when
on, the calking was easy."
The next glue-up
was more demanding, but after I got the hang of the amounts I
needed to trim away to fit the plank to the stem, and let it overhang
the transom so I could trim it later, it became much easier. The
bend at the prow was abrupt, but the steaming proved to be sufficient
to pull the plank into place since I was using both large c-clamps
and deck screws to hold it. Once the glue fastened the second
plank to the first one, with clamps squeezing them together, I
was ready to let the glue set.
In many ways
those were the easiest planks to fasten, for they had little curve
or twist, and the transom was nearly perpendicular to the floor
at the upper end. I continued adding planks to the bottom of the
hull by cutting them on an angle to admit the next plank, and
then edge-gluing them in place. By May 13th I had several of the
lower planks on both sides and the same two at the gunwale. I
would hold one plank alongside another by using a block of wood
under the clamp, and for others I fastened them by glue to the
ribs and the plank next to it, as well as long deck screws. It
was far more robust that it needed to be.

One disturbing
problem I was beginning to notice was the keel was nowhere near
as deep as I'd planned on. Because some of the upper keel was
embedded in the ribs, and almost an inch (2.54 cm) of it was covered
by the planking, the original nine inch (22.8 cm) keel was down
to six (15.24 cm) or seven inches (17.78 cm). Although that meant
I would need to deepen the keel if it was going to act as a lateral
force against the water while I was sailing, I figured I could
save that problem for another time.
The next issue
was the cabin superstructure. I started with the companionway
by timbering either side of what would be the main hatch, and
then closing in the bulkhead with quarter inch (.635 cm) plywood.
It was mainly needed to close off the space, and only part of
it was meant to be structural, but I still glued it to the timbers
as well as used drywall screws to hold it in place.
The next few
weeks as the month of May drew to a close were busy ones. I spent
a generous amount of each day installing planks, reshaping and
fitting them to bond with the plank beside them as well as the
ribs and stem, all the while butt-blocking their joins. After
three hours or so of fitting a rib and making it ready to glue,
I would begin the next one on the other side. Setting one plank
per side meant I could brace the plank with boards between it
and the next, and then partially clamp it by wedging cut off pieces
from the rest of the timber into the gaps.
That still
left me with a few hours free every day, so I began to work on
the forward deck. It was meant to be a solid piece of 1/4 inch
(.63 cm) plywood, and, like the cabin roof, to flex both sideways
and forward and aft for added strength. I also needed to allow
the Sampson post to protrude through the centre and the deck needed
to be notched for the stem. It was finicky making sure the centre
cutting worked, but once I had it in place, I left the sides rough-cut
because I knew I could trim them later with the planer.
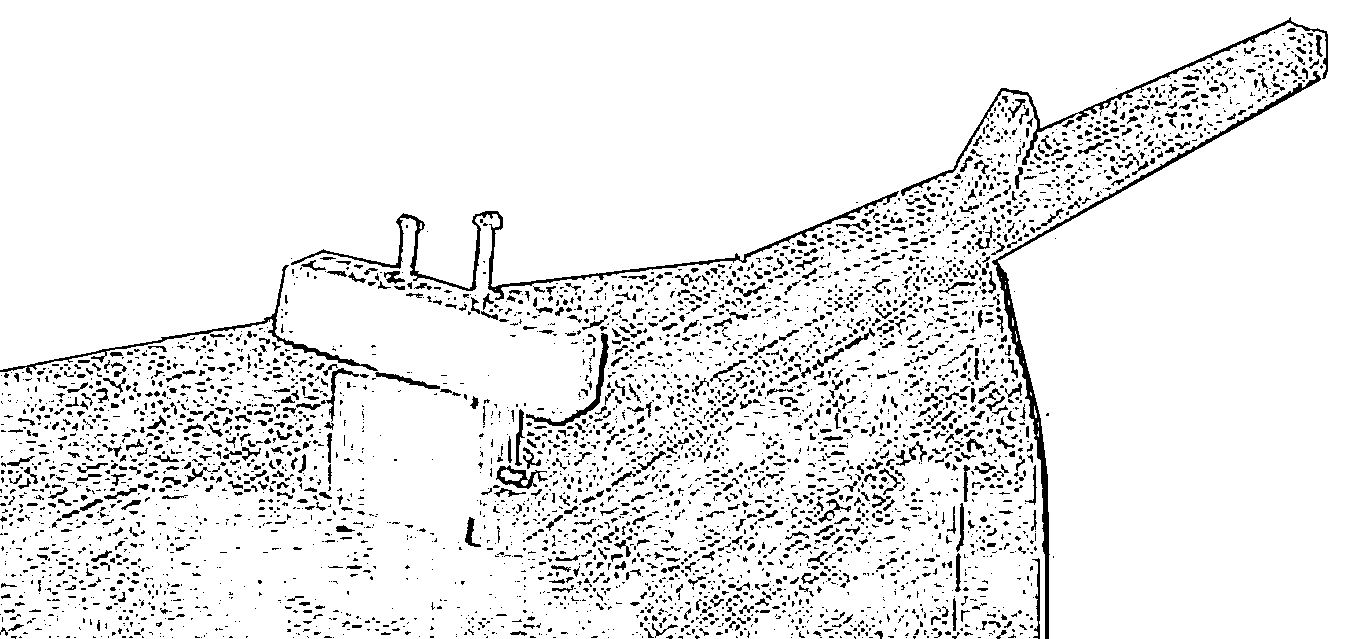
The last part
of the prow which I settled into place was the bowsprit. It had
been made earlier from a thick 3 x 5 x five foot (7.62 cm x 12.7
cm x 1.54 metres) piece of clear Douglas fir. I had cut it into
a long triangular shape, notched the end so that it would fit
around the Sampson post, and settled the centre of it over the
stem. Pins held it in place over both timbers, but it was not
otherwise fastened. I wanted it to be removable in case I needed
to trailer the boat. The timber was much thicker forward than
it was aft, for its strength went into two planes depending on
what was needed. Forward, the bowsprit extended two feet (60.9
cm) over the stem, and back along the decking for another twenty
inches (50.8 cm). It needed to be sturdy to hold the standing
rigging-although I intended to support it with a water stay so
that the forestay wouldn't force it up or the jib break it when
I was under sail.
Once the bowsprit
was fitted to the hull, I carried on with the planking. The hull
was gradually being closed up, and the only issues I had besides
the hard work was the litany of negativity coming from my sister's
neighbours when she brought them to see the monkey show. They
would never enter the garage using the door, but would instead
stand while my sister threw open the main door. Even if I said
hello, they never addressed me, so I just carried on with my work
and addressed their complaints as they made them.
|